Monday 12 May 2014

Overall Evaluation

I think this unit was hard to start the work, I say this because of the tittle "Expanding Horizons" had confused me at first. I had got confused because I wanted to base my work of what I thought the phase "Expanding Horizons" mean to me. The first idea I had got from the tittle was about sun sets and sun rise, I don't want to do that idea because I don't want the work to be too obvious ro the tittle of the work. After some research and looking at some photos the tittle "Expanding Horizon" reminds me of mediation and martial arts. After getting a theme on what I want to do for my work I then have to do some research to construct an idea for my work.
After seeing other photographers work and some movies I got an idea on what I want in my photos. My main idea was having a lot of martial arts moves and weapons in the photo. The problem with that idea was I wasn't thinking about what I want in the photo I just focused my photos on the fighting and weapons. After doing some more research I then came up with the idea of one photo showing a soft side of martial arts and one photo showing a agressive side of martial arts. I wanted to do this because I want my photo to have a message in it that people who do any for of martial arts can relate to.
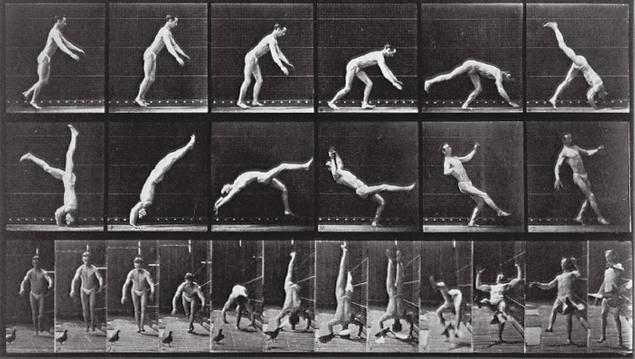
My main influence of my final work was Stefanie Jung and Clifton Li. Jung had gave me inspiration for my photo because of the way she overlay her photos, I think it was a great way to show two sides  next to each other to see what it looks like as one photo over each other.
Clifton Li had inspired me for my martial arts photo because of the was he looked at the motion and the impact of the move in the photos. His photos had inspired the pose and how to get a martial arts feeling from the photos. Before doing any photo shoot I have to write up a health and safety list to make sure it will be followed to prevent any accidents 
After some planning and some test photos I then saw that I needed to improve some of my ideas. My original idea was to have a sword pose in a urban landscape at night, the problem with that idea was the photo was hard to look at due to the overlay effects and the way the photo was taken. In the photo the background did not match the theme of the photo, I say this because it was really hard to see some areas of the subject and the photos was taken around dusk when it was starting to get dark. The way the photos turned out then was really hard to work with. My editing on the photo didn't really work but I had recorded the processe so I can use it to improve on.
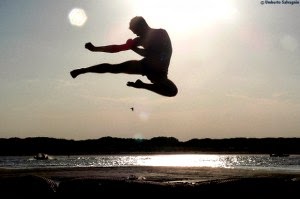
My second idea was to have a photo of me doing a fighting style that dose not include any weapons in it but still in the urban theme. The photo worked because of the poses that was struck and the background was not noticed. The message of the photo was not clear because of the limited use of photos.
After my two failed ideas I had to stop with the photos and break my ideas down, this is what I came up with,

Martial arts is:

  • Peaceful - shoalin monks use martial arts for meditating
  • Chinese martial arts are more defensive the offensive
  • Defensive martial arts has little weapons and have a strong pose.
  • Agressive - Japanese warriors sue martial arts to fight in war
  • Japanese martial arts are more offensive then defensive
  • Offensive martial arts has more weapons and more agressive pose

After looking back at the list I have broken down I then know what type of photo I was after. I had to do some research on looking at the different martial arts to see which one would be used in my photo (Baji Quan - Chinese and Aikido - Japanese).
Before I take any photos I hade to look for a location that the photo will be legal to take due to the weapons and to make sure the weapons won't hurt anyone around. After finding a location I then start my photo shoot.

This time my photos work and I was ready to edit the photos. After a long think about how the photos will be edited I was then ready to present my final image.

What I like about this module was it was challenging and it pushed my mental skill in photography to the limit. I like how the module helped me find solutions around problems that I have encountered. I think after all the research I then have a strong final image, I say this because the message of the photo was clear, the way everything in the photo was though about and I had got a person who knows how to perform these moves to make the moves real not staged so the photo is more real to the viewers.

What I don't like about the module was it took so long to produce work, this is because of the understanding of the tittle; I also found the module very frustrating because of the constant change I ha done to my work.

If I was to do this module again I would pick one theme to begin with and stick with the idea and find research to back the idea up instead of constantly changing the idea. I would also consider picking a different theme then martial arts, I say this because this module was ment to be in friendly to younger viewers and some people have the impression that martial arts is not friendly to younger viewers. I would also experiment more with my work then just stick to one technique and use all the way.


Contact Sheets


My Final Image

After a long look at my photos I had chosen a final photo.


I had chosen this photo to be my final photo because the message it shows in the photo (only the people who do martial arts get). My photo shows two style of martial arts coming together, one martial arts is Chinese and one is Japanese, both have different style and have different styles to the motion showing meditation.

This is a photo showing a Chinese martial arts in a meditation sparing pose. The person in the photo is me; the reason why I am in my own photo is because I was unable to find another person who can do a certain style of martial arts for the Chinese style. I want a certain style because I want to have a clear message in the photo. The martial art style that is shown in the photo is Baji Quan. I Quan wanted a Baji pose in my photo because it has a strong striking pose so it would make it easier to edit around. This pose shows a defensive style because it shows the soft side in martial arts.

This photo is showing a Japanese style of martial arts with a more offensive pose. I have told my model to strike this pose because it show a form of a stage that is ready to attack, I say this because of the way the sword is a parts and the arm is out and tensed up. This pose is the oppersite with the Chinese pose, I say this because instead of striking a pose of defence this pose shows the model is getting ready to attack. This martial art style is a mix of Kendo and Aikido, the reason why I have chosen this martial arts because it has more offensive pose then a defensive pose.

Evaluation

I think that this photo is a really well thought of photo; I say this because I was focusing on every details in the photo, this is because of the location, the location I have chosen for the photo shoot is at the very back of the garden, I have chosen this location because the setting, layout and surrounding of the area looks like a training court outside a temple for monks.
I had also put some focus into the dressing, the reason for this is without a martial arts uniform I have to find clothes that can simulate the uniform. For the Chinese style I have chosen a white long sleeve shirt with a black lose trousers. The white shirt and the black lose trousers shows that the clothes are a little baggy, Chinese style of martial arts clothes are a little baggy to allow more movement.
The colour of the shirt is white because it shows peace and mediation.
For the Japanese style I had made my modle wear black lose trousers and a black short sleeve shirt, the reason why I have done this is because Japanese style clothing is only lose at the bottom and more tight at he top.
Normally the uniform has to have a long sleeve shirt but I shown it in a short sleeve shirt to make a the photo look more agressive, the colour black was meant to bring out the aggression in the photo.
The weapons were also placed in the photo in such a manor; I say this because in Chinese martial arts they normally use oak staff to train. I had found a oak staff to use in the photo shoot to push the photo into it's ethnic origin.
The katanas (swords) are a authentic Japanese style sword, it's very obvious that the sword is Japanese because of the way the sword is shaped, the handle, hand guard and the case. By having that sword into the photo it sows the martial arts ethnic origin.

What I really like about this photo is the amount of thought that was put into the photo every detail was thought of. I think the location of the photo makes the photo more ancient, I say this because of green surroundings and the stone ground.

I don't think there is anything in the photo that I do not like, this is because of the details in the photo.

If I was to do this again I would experiment with the way I present my photos i.e. taking a location photo and overlay two photos over the location photo. I could also cut both subjects out and paste them on a location photo with faded effects.

My Final Work


For my final work I had came up with a series of photos that will picked out to use my final image. For my final images I had found another way of overlaying a photo.
The first thing I had done was upload two photos on to Photoshop, I have to make sure i drag the second photo on the same window on top of the first window to make the image layer on top of the other.
After doing that I then go to the left of the window and look for a small section that shows the layers and the layer style, when I find a small box that say "normal" I click on the box and go down to overlay, after highlighting overlay I then click on it then my image will come up like this.
After the image come up like this I can then adjust the photo by changing the curves, exposure or anything else if necessary.

Here are more images I want to use for my final:

1


2

3


I think all of these images were well though of; I say this because of the way the photos really blend in together with the over layer effect. I like how the image is more sharper and the curves had been changed to balance out the colour, I also like how the photo had been blended in together. I think this effect is more effective then the changing the opacity, I say this because the way the photo is easier to look at.

There is nothing about the photo I don't like; the only thing I don't like is how the photo was made, I say this because of the computer had done all the editing for me, the only thing I had done was take the photos, upload it and set the layer, the computer had made my work easier but I didn't do much for my photos
If I was to do this again I would try and edit the my photos the way the computer had edit my photos to change other features and to experiment with what I know or can do.

Monday 28 April 2014

Final Preparation change

Due to recent change of ideas and lack of locations I had to change my idea for my final image. I was going to overlay one weapon in my photo this is because of location and crowd, I am still going to use a proper martial artsist to perform the moves for safety reasons.

I am still going to stick with the original plan with the multi layer photo and the martial arts theme, the only thing that is changing is the amount of weapons used in the photo shoot. My modle will be my twin sister, the reason for this is she can do martial arts, train in weapon marial arts and she' easier to get a hold of.

In some photos I will be in it; this is because of a limited amount of people I know who can do martial arts or properly use a weapon. Not all of my photos will have weapons in it, I want to experiment with hand to hand martial arts as well as weapons.

Monday 7 April 2014

Something fun

I wanted to try something fun and have some Photoshop practice so I had made this photo for you to enjoy.
I had made this photo by finding a large JPEG file on google and saving it to the desktop. I had made this picture by Dragging the original on Photoshop and by using the clone tool I had cloned out the character on the left and then fix up the background. Then using the previous work's left overs I had decided to paste myself on the layer. How I made my photo as I was turned around I just go on image rotation in image what is located on the top bar in Photoshop. After doing that I then fix up photo by tilting me reposition and resize me to match the picture. After doing that I then drop the shadow to make the photo more realistic.
I like this photo because the way I cannot see the colone tool marks and the way the photo had come together in the image.
This photo was made for fun but if I was to do this again I would try and match the text up with the other text. I would do this by making my text bigger, bolder and brighter.

More work

I have decided to make more photos to practice my expanding horizon work, I wanted to add some martial art theme for my work, I want it to be part of my theme in the project. I want to keep with the multilayer photo so I had to approach the way I make my photos the same way I make my other over layer photos.
I had no one to take photos of for this photo so I had to make a self portrait, I had made my photo by setting the camera shutter speed on 1/2000 before I start the shoot I have to test the camera and the ISO of the camera. After the camera is set I can then perform my move. It took a few goes to get the photo buT I manage to time my moves right.
 

After the photo shoot I have to then upload my photos on the computer to sort out which photos are worth using. After sorting out the photos I then go on Photoshop with my best photo and start editing. I start my editing with using the quick selection tool and  only select me in the photo. After I select myself I then copy the selected area and paste it on a new layer. 

After pasting on a new layer I will have some unwanted parts in my photo, to get rid of the unwanted parts in my photo I have to use a rubber with a soft edge and go around the photo. after going around the photo I can the use the quick selection again and clear the unwanted area, after doing that I can then copy that image and paste again on a new layer.
I have to remember to change the opacity of the photo to match the motion. After I was done with the photo I looked back at the photo of it and thought the thing was plain, I wanted to add more life or feelings into the photos. So what I have done to the photo was choose a layer of me in it and in one of the layers I changed the hue and saturation of the photo and the other layer I had changed the colour of the photo, I had left the back ground the same colour, I had done this because I thought the photo would work out more if there are at least one normal colour layer.

This is my finished photo.
I think my finished photo turned out better then I though it would, I say this because the order of the photo is normal hue and colour, I had done it in this order because I want the photo to look 3D. I think I had achieved a 3D like effect but not fully 3D, I say this because when I look at the photo I see that the photo is descending into the background by being faded away from the photo.
What I like about this photo is I has made one of me a block colour and one of me as a faded colour, I think this really works as a whole photo because I look at the photo and see it as a pop art like form.
What I don't like about this photo is I cannot see any of references of Jung's photos. I may have used a multilayer effect but I can not relate to her photos.
I think this photos can relate to Harold Edgerton because of the motion and how it's being presented on the screen.
If I was to do this again I would reshoot this motion in a still position and perform a move thought the photo and over layer them on that way like the way Edgerton makes his photos.

Monday 31 March 2014

Eadweard Muybridge

Muybridge is another photographer who uses a fast shutter speed to make his photos. How he present his photos is by positioning them along side each other like a slide show or a flip book. The way Muybridge captures the photo is by getting the subject to perform a move and he captures the images with a very fast shutter speed to show what we can not see because the motion is too fast.
The most famous work this Muybridge had done was the photo of the horse running, this is because it shows that when the horse run it shows that the horse is fully of the ground in one point when it's running. This is my favourite photo because in each photo it shows a different photo that the camera has captured.
I think I would use the technique that Muybridge had use to present his photos as a un edited photo, this is because I want to show people what goes into a martial arts move that people don't see.

I like how Muybridge uses a really fast shutter speed to capture every motion in the movement. Some of his photos show motion in movement that we never see think about.
I don't think there is anything wrong with Mybridge's techniques. 

Harold Edgerton

Edgerton is a photographer who uses a technique called multi flash. Multi flash is a fast shutter speed technique. Edgerton kwon techniques for the way his photos shows a series of images captured by a fast shutter speed. This is an example of one of his work, the photo shows a man swinging a gold cub and the photo shows the swinging motion.
I like this photo because I like how the golf cub creates a pattern as it's crossing over each other. I think I would use this technique for my work because I think it shows movement and life in a still photo, I also want to see if i can make a pattern out of my over layered photos.
How Edgerton made his multi exposed photo is by capturing the photos, over layering them on top of each other and erasing the empty section out only showing the person or the object. I will use the same technique as Edgerton but I will make my photo on Photoshop. I will also use a coloured image, this is because it's in my style of photography. I will be taking my photos on location instead of studio.

I like Edgerton's technique because it shows a more clearer image of over layer, I think that the way Edgerton uses the fast shutter speed. The way he captures his photos is showing the motion of how people move.
What I don't like about Edgerton is he only uses a fast shutter speed, I wanted to know what's it's like if he captured the things on his photo with a slow shutter speed.

Monday 24 March 2014

Second Work

For my second attempt I want to try a different technique and a different approach to making a different photo. For this photo I am still going to use Stefanie Jung's technique but this is is a lot different to the previous photo, there will be some similarities but the way the photo is presented is different.
For my second photo I had started with the basic three layers on Photoshop with one photo as a background. All of the three images on Photoshop has to be the same image, this is because of the technique that is going to compose the photo. This is going to be a Stefanie Jung classic technique.
After dragging three of the same photos on Photoshop or duplicating the layer I then have to change the opacity for each of the photos. I have to make sure all of the photo is even in opacity, the reason for this is if the photo is not balanced then the photo will not work. After balancing out the opacity of the photo I can now create a dream like illusion in the photo.
I have to move one layer aside at the time, In this photo it shows the photo is being moved downwards to the left, this photo shows a natural multi espouser effect with only one photo. I have to position the photo is a pattern that is easy on the eyes, the reason for this is some people can not focus on a multi layered photo so I have to make sure the photos have a fair amount of space between them to make it easier for the viewers. This is my most favourite technique for Stefanie Jung, this is because it shows a fixed illusion in the photo making it look busy. 

After I finished moving the photo and making some last changes in to the opacity I can then flatten the photo. After I flatten the photo I want to centre my model in the photo so I use the crop tool and move one side over until I ca move the photo enough to centre my model and to get rid of some unnecessary object obstructing the photo.

Finished Photo

This is my finished photo of my second image this photo shows a clear example of work that had been inspired by Stefanie Jung. This photo is easy to make, I say this is because I can use any photo and make it look like this by changing the opacity and moving the image aside. I have used this technique because this is one of my favourite technique to use for photo manipulation.

What I like about the photo is the way the photo shows a typical multi exposure photo. I say this because of the way the photo is balanced out in the opacity. The opacity is balanced because of the way the photo is blurred out is balanced by the colour. I also like the way the photo shows movement and life in it though it's a still image.

What I don't like about the photo is the photo is a bit dark, I say this because since the photo is accompanied with the flash on the camera it makes the photo look flat. The flash on the camera makes the photo look flat and makes it harder for me to edit the photo on Photoshop. If I was to do this again with improvements I would take the photo in a different location to make it easier on the eyes. I would also take a location photo when it's a lot brighter.

This photo is still a practice shot like the first photo; these practice shot had gave me an idea in the direction to head for my work. I also think with the improvements that needs to be made had shown me what certain photos look like in locations and the time for the photo to be taken.

First work

This is my first work for Expanding Horizons; this work is only a test piece to give me an idea on what I want or going to do for this subject. For my first photo shoot I had used a model to perform martial arts moves in the. I had composed my photos by telling my model to slash down in a slow motion and stop at a specific place so I can capture the motion.
These are the three photos i am going to manipulate to make my Image referring to Stefanie Jung's multi layer photo. I had told my model to pause in a pose because it would make it easier for me to layer it over each other. This photo was taken in location; the photos were taken in a privet area in the back garden, the reason why I had taken a photo in a privet residential area because of the use of weapons. I had also used a certain person to be in my photo shoot because I want to use people who knows how to use the weapons properly, I also want real trained marshal artist.
Originally in my ideas I wanted to use a fast shutter speed to capture the motion but the results was a failed due to the amount of light in the background. The photo shoot was taken at night because I wanted to experiment with the lighting of and the background like Umberto Salvagnin's work.


After the photo shoot I then uploaded my photos on the computer and only dragged the photos that is needed on Photoshop. After dragging the photos on Photoshop I then have to over layer them on top of each other. I had done this by opening one photo as a background and then I drag the two photos on. I have to make sure the photos are in order in form of ascending from the movement. I can check how many layers I have by going on the side bar and looking at the line going down. After I had done this I have to change the opacity of the photos.
I have to change the opacity of the photos because I want to make it look like my model is moving in the photo and I also want it to be a multi exposure photo. I can change the opacity of my photos by selecting the photo layer, after doing that I look above the layer box and find where it say "opacity" in the box it should say 100%, after finding that box I can change the opacity by clicking on the box and moving the marker (small triangle), I have to remember moving the marker left will lower the opacity, moving the marker right will higher the opacity. In my case I have to lover the opacity; I have to do this to the layers that is not marked as "background".
I have to make sure my layers are balance by looking at the photos and judging if i can see all of the photos properly. After doing that I have to flatten the image, the reason for this is if I make any changes to the photo it will change all of the whole photo not the one layer.
After I flatten the image I then crop the photo; I have cropped the photo because I want the photo to be focused on my model. I also want unwanted object in the photo out of the photo i.e. the lawnmower. I had also used this opportunity to centre my model in the middle of my photo. I think this change to the photo really works, I say this because when I look at the photo I can see my model at the centre of the photo making it easier to look at.
After cropping the photo I then saw my photo look a bit flat, so I had decided to change the curves of the photo to make it look a bit more 3D. I can bring up the curves tool by going on the top bar in Photoshop, click on image, adjustments then click on curves. The faster way of bringing up the curve tool is hold command on the keyboard and press "M". After changing the curves my photo is finally finished.


Finished Photo

This is my finished first image; I had made this photo my mixing in Umberto Salvgnin's location experimentation and Stefanie Jung's multi exposure technique. I had mix both of the artist together to make this photo because I thought it would work as a photo. I think this photo is a really good photo for a first attempt because of the balance of the opacity.
What I like about this photo is how my model is using real moves and it's being portrayed in the photo. The way the photo is layered over each other shows a clear idea on how the model had performed the moves and also it gives a still photo life. I also like how the photo is a straight, I say this because of the wall in the back ground is still and also there are no surrounding moved out of place.
What I don't like about the photo is the location; I say this because of the way the urban background clashes with the photo and the message of the photo. I think if I was to change my technique for the next time I would change the location to make it more suitable for the photo to show marshal arts true nature.
I also don't like the lighting of the photo; I say this because of the way the photo looks really dark and not a lot of details is shown in the photo because of the flash of the camera lights up the visible area and near by surfaces of surrounding area. The flash of the camera makes the light unbalanced and had to work with on Photoshop when it comes to editing.
For my future work I will make changes from this photo. I am going to take the photos when there are more day light. I will do this because I think if the light is out then the image will be easier to work with and edit. I will also change the location this is because I want to have a location that matches the theme of marshal arts, I was think a plain background or a studio like the way Clifton Li take his photos in a block colour background.

Monday 17 March 2014

Stephanie Jung

Jung is a photographer who is known for using a photo manipulating technique called over layer or multiple  exposure. Jung had a few ways to make her photos, one way how she made her photos is by using a normal camera to capture the images. The photo that she produce is purely with photos from a camera, she creates the photo by using multiple exposure via Photoshop.

There are different ways of using Photoshop to create a photo. This photo looks like a scratching texture I think it's really effective as a multi layered photo, I say this because the scratching texture makes the photo look like a faded memory style photo. It's not known how Jung had made this photo; I don't think I want to try to recreate this technique, the reason for this because without knowledge on how this photo is made I do not want to consume so much of my time trying to recreate this photo.


Another technique Jung had also used to make her photos is by taking photos of a location and then layering it over each other then turn down the opacity of the photos.
This photo shows that it was taken the moved across the screen to make a photo, I say this because you can this this is only one image by layered on top of each other with the opacity turned down. I really like this photo because of the way the photo shows a dream like illusion. I like how the photo shows that it has been moved across each other. I also like how balance the photo is, I say this because the way the photo is ascending in the photo. I also like the location of the photo, I like it because of the lights, the building and the people walking the street, it makes the photo look busy and shows a lot of life in the photo. I think the light in the photo naturally brings out the photo.


I like Jung's photo manipulation technique because of the illusions it can create with just over layering the photo over each other. I like how she doesn't always use a  digital camera in her work, I like how she use a camera for filming for photography use. Some of Jung's work shows her experimenting with shutter speed to capture only lines of light.
I'm a big fan of Jung's work; there's no work from Jung that I don't like. I think that Jung over use her technique sometime but I think she makes it up by experimenting with exposure and location where she takes photos at.

Jung's work has inspired me in the past and again she photos had inspired me some more. This time I am going to experimenting with over laying the photos by tilting the photos instead of moving the photos to the side a bit.

Monday 10 March 2014

Health and Safety

For my work in this unit I will be working with real weapons and I want to take the highest measure to avoid any accidents that could lead to serious injuries or death. These are the rules that I am setting to avoid having any accidents.

  • Make sure the area and surrounding have anything sticking up or sharp coming out.
  • Make sure no one is in the room or in the way of the weapons.
  • Make sure all weapons are out of the way and stored properly on the stand.
  • Weapons are only handled by professionals
  • Do not draw any weapons at anyone
  • Do not point the weapons at anyone
  • Do not run with the sword while it's drawn
  • No food or drink
  • No baggy clothes
  • No long hair
  • Don't leave bags and coats lying around.

My Proposal

My idea for competition is to produce some portraits of someone performing martial arts moves. I want to capture the action involved, so will use fast shutter speeds to freeze the movement, with the surrounding elements (dirt or sand on the floor) being disrupted. This is inspired by the photographic work of Clifton Li.
 I want to explore this theme because of the movement and the control that is required for both subject and photographer should have to achieve results for a perfect martial arts photo. This photo from Li is a prime example of control with both subject and photographer. I say that in this photo it shows the subject has control because the subject knows what he’s doing. I say this because of the pose he had struck.
The photo also shows the photographer is in control because of the quality of the photo, that the photographer knows what to set the camera on and the exact moment when to take the photo.

I would also like to experiment with the Martial artist using the props used within their practice: weapons such as swords, nun chucks, staffs and any other. If I do experiment with this, I would like the person to stand still and only have the object and the person’s arm moving in order to create an interesting motion blur. This would be carried out in a private indoor environment due to the nature of using such props. I am particularly interested in using weapons as it is a form of control used within the meditation and is a reality of martial arts.

I think by working with weapons in my photos make the motion blur more effective. I say this because I think by seeing the motion of a person performing with a weapon is more effective then using body parts because by using a weapon you can be able to see how the subject is using the weapon and how the lines will come out. I also think its good practice for multi exposure.

Further to this theme I would like to experiment with photographing a range of fighting stances various locations and studio shoots.  I am also very interested in created silhouette shots like in the work of Umberto Salvgnin, where the viewer can focus upon the shapes of the people that are created through their moves.
I want to make a photo like Salvgnin because of the way she uses a fast shutters and the way she used her surrounding as an advantage.

I was also thinking of using multi-layer techniques in my work, inspired by that of Stephanie Jung when presenting the final image emphasising the feel of motion in the photograph. This is something that I have used previously within my work which I think is effective.
This is an example of her work of overlay work. I like this work because of the way the two photos layering over each other to compose another photo. This is one way of making an overlay photo.


These are some examples of what type of work I will be producing in this unit. With the influence I had gained from other artist.


This photo shows a style of multi layer where all the photos are different but layered on top. I am going to use this technique; this is because of the three photos overlay on top of ach other creates a natural motion in the photo. I am going to use this technique because I think this technique is effective and I will use it to produce some of my photos.
I was going to make photos like this by using Li’s technique to capture the photo and I will be editing the photo by using Jung’s multi layering technique.

This is another style where the photograph is the same but the opacity is lowered and the photos are moved aside on each layer. Jung inspired this technique because of the way the photo is pulled aside. This is a classic technique for me because I had used this technique a lot in my past work.
For this unit I am going to try and use this technique as minimal as possible because I have used this technique so much I cannot gain anything by using it again.